
Discover the joy of crafting your own outdoor haven! Free printable Adirondack chair plans, often in PDF format, empower you to build a timeless piece,
designed for lasting comfort and relaxation in your garden or patio.
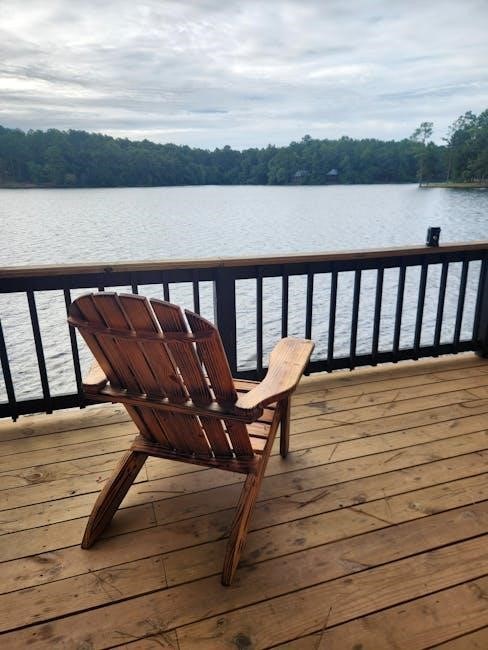
What is an Adirondack Chair?
Originating in the Adirondack Mountains of New York in the early 20th century, the Adirondack chair is instantly recognizable for its distinctive design. Characterized by a high, slanted back and a wide, comfortably angled seat, it’s built for relaxed lounging. Traditionally crafted from wooden planks, these chairs were initially designed to withstand the harsh outdoor elements of the region.
Over time, the design has evolved, but the core principles of comfort and durability remain. Modern variations often incorporate different materials, but the classic aesthetic – wide armrests, and a generally low profile – persists. The chair’s construction lends itself well to DIY projects, making it a popular choice for woodworkers of all skill levels. Its enduring appeal lies in its ability to create a welcoming and relaxed atmosphere in any outdoor space.
Why Build Your Own? (Cost, Customization, Satisfaction)
Embarking on an Adirondack chair building project offers compelling advantages. Firstly, the cost savings can be significant; building yourself is often cheaper than purchasing a pre-made chair, especially high-quality ones. Secondly, you gain complete customization control – choose your preferred wood type, stain color, and even modify the design to suit your personal taste and space.
Beyond the financial and aesthetic benefits, there’s immense satisfaction in creating something with your own hands. The process of transforming raw materials into a functional and beautiful piece of furniture is incredibly rewarding. Free printable plans democratize this experience, making it accessible to anyone with basic woodworking skills. Ultimately, a self-built Adirondack chair isn’t just furniture; it’s a testament to your craftsmanship and a source of lasting pride.

Finding Free Printable Adirondack Chair Plans (PDF)
Locating free, downloadable Adirondack chair plans in PDF format is surprisingly easy! Numerous online resources offer detailed guides to help you begin your build today.

Popular Websites Offering Free Plans
Several websites consistently rank as top sources for free Adirondack chair plans. Ana White is a widely recognized name, providing beautifully illustrated plans suitable for various skill levels, often emphasizing beginner-friendly projects. Her site frequently features downloadable PDFs.
Woodworking for Mere Mortals, hosted by Steve Ramsey, offers video tutorials alongside printable plans, making the building process even more accessible. Instructables is another valuable platform, hosting user-submitted plans with diverse designs and construction techniques.
PlansNow provides a curated collection of free plans, including several Adirondack chair variations. Don’t overlook MyOutdoorPlans, which boasts a dedicated section for outdoor furniture, including detailed Adirondack chair blueprints. Remember to always check user reviews and plan completeness before starting your project!
Understanding Plan Variations (Classic vs. Modern)
Adirondack chair plans aren’t one-size-fits-all; variations abound! Classic designs typically feature a high, slightly curved back composed of wide, vertical slats, a deeply angled seat, and broad armrests. These prioritize comfort and a traditional aesthetic.
Modern interpretations often streamline the silhouette, employing cleaner lines, lower backs, and sometimes omitting the traditional slat design for a more contemporary look. You might find plans incorporating metal accents or alternative materials.
Fanback chairs, a popular sub-style, showcase a back constructed from numerous curved slats resembling a fan. Double chair plans allow for shared seating. Carefully review plan images and dimensions to ensure the chosen style aligns with your preferences and desired outdoor space ambiance.
Checking Plan Completeness (Materials List, Dimensions, Instructions)
Before committing to a set of free printable Adirondack chair plans, thoroughness is key! A complete plan must include a detailed materials list, specifying wood types, quantities, and hardware requirements – screws, bolts, washers, and potentially wood glue.
Precise dimensions are crucial for accurate cuts and proper assembly. Look for plans with clearly labeled diagrams illustrating each piece and its corresponding measurements. Step-by-step instructions should be easy to follow, ideally with accompanying visuals.
Beware of plans lacking crucial details; these can lead to frustration and wasted materials. A good plan anticipates potential challenges and offers solutions. Ensure the plan’s complexity matches your skill level to avoid an overwhelming project.

Materials Needed for Adirondack Chair Construction
Gathering quality materials is essential! You’ll need lumber – cedar, pine, or redwood are popular – plus screws, bolts, and washers for a durable, beautiful chair.
Recommended Wood Types (Cedar, Pine, Redwood, Pressure-Treated Lumber)
Choosing the right wood significantly impacts your Adirondack chair’s longevity and appearance. Cedar is a top choice, naturally resistant to rot, decay, and insects, offering a beautiful aroma and reddish hue. However, it’s generally more expensive.
Pine is a budget-friendly option, easy to work with, but requires thorough sealing and regular maintenance to withstand the elements. Redwood, similar to cedar in its natural resistance, boasts a rich color and is relatively stable.
Pressure-treated lumber provides excellent protection against rot and insects, making it suitable for long-term outdoor use, though it may require careful finishing to avoid splinters and maintain aesthetics. Consider the climate and your budget when selecting the ideal wood for your project, ensuring a comfortable and lasting outdoor seating experience.
Hardware Requirements (Screws, Bolts, Washers)
Securing your Adirondack chair requires appropriate hardware for durability and safety. Exterior-grade screws are essential; galvanized or stainless steel resist rust and corrosion. Length will vary based on wood thickness, typically 2.5 to 3 inches.
Bolts, often used for arm and backrest attachment, provide superior strength. Use washers under bolt heads and nuts to distribute pressure and prevent wood damage. Stainless steel bolts are highly recommended for longevity.
Washers are crucial to prevent the bolt heads from sinking into the wood and to ensure a tight, secure connection. Consider using locking washers to prevent loosening over time. Always refer to your chosen plan’s specific hardware list for accurate sizes and quantities, ensuring a robust and long-lasting chair construction.
Tools You’ll Need (Saw, Drill, Sander, Measuring Tools)
Embarking on your Adirondack chair build necessitates a selection of essential tools. A circular saw or hand saw is vital for accurate wood cutting, following the dimensions detailed in your chosen plan. A power drill, equipped with various bits, will handle screw and bolt installation efficiently.
Sanding is crucial for achieving a smooth, comfortable finish; an orbital sander significantly speeds up this process. Precise measuring tools – a tape measure, combination square, and level – are non-negotiable for accurate assembly.
Safety gear, including safety glasses and ear protection, is paramount. Clamps will aid in holding pieces together during gluing and screwing. Having these tools prepared will streamline your building experience and ensure a professional result.
Step-by-Step Building Guide (Based on Common Plans)
Follow your chosen plan meticulously, starting with precise wood cutting, then assembling the back, seat, and arms, finally uniting all components for a sturdy chair.
Cutting the Wood Pieces (Following Plan Dimensions)
Accuracy is paramount during the cutting phase; meticulously transfer the dimensions from your chosen printable Adirondack chair plans PDF onto the wood. Utilize a sharp saw – circular, hand, or jigsaw – to ensure clean, straight cuts, minimizing splintering and ensuring proper fit during assembly.
Double-check each measurement before cutting, as even slight errors can accumulate and affect the chair’s overall structure and appearance. Pay close attention to angled cuts, particularly for the back slats and armrests, as these contribute significantly to the chair’s iconic silhouette.
Label each piece immediately after cutting to avoid confusion later. Consider cutting a few extra pieces of common lengths for potential mistakes or adjustments. Remember safety glasses and appropriate hearing protection are essential throughout this process!
Assembling the Chair Back
Begin by laying out the back support pieces according to your printable Adirondack chair plans PDF. Typically, this involves attaching vertical slats to the upper and lower back rails. Employ wood glue in conjunction with screws or bolts for a robust and lasting connection.
Ensure the slats are evenly spaced, referencing the plan’s specifications for consistent aesthetics. Pre-drilling pilot holes is crucial to prevent wood splitting, especially when working with cedar or pine. Clamp the pieces together while the glue dries for optimal adhesion.
Pay attention to the angle of the back; a slight recline is characteristic of Adirondack chairs, enhancing comfort. Once assembled, carefully inspect the back for squareness and stability before proceeding to the next stage.
Constructing the Seat
The seat is a foundational element, demanding precision. Using your printable Adirondack chair plans PDF, cut the seat boards to the specified length and width. Most plans call for slightly curved seat boards for enhanced comfort – achieve this with a jigsaw or by laminating thinner strips.
Attach the seat boards to the seat frame, again utilizing wood glue and screws; Maintain consistent spacing between the boards to allow for water drainage and prevent warping. Reinforce the corners of the seat frame with corner braces for added strength and durability.
Double-check that the seat is level and securely fastened to the frame before moving forward. A well-constructed seat is vital for the chair’s overall stability and longevity.
Attaching the Arms
The arms provide crucial support and contribute to the chair’s iconic aesthetic. Referring to your printable Adirondack chair plans PDF, position the arms onto the chair back and seat assembly. Ensure proper alignment – the arms should be symmetrical and comfortably positioned for resting your elbows.
Secure the arms using a combination of wood glue and exterior-grade screws. Predrill pilot holes to prevent wood splitting, especially when working with cedar or redwood. Consider using bolts with washers for extra strength at the primary connection points.

Reinforce the arm attachments with additional bracing if your plans recommend it. A solid arm connection is essential for the chair’s structural integrity and user safety.
Putting it All Together (Back, Seat, Arms)
Now comes the satisfying stage – uniting the core components! Carefully align the assembled chair back with the seat, referencing your printable Adirondack chair plans PDF for precise positioning. Employ wood glue along the joining surfaces for a robust bond, then secure with exterior-grade screws.
Ensure the back is firmly attached and at the correct angle for comfortable reclining. Next, double-check the alignment of the arms before finalizing the connections. Reinforce all joints with additional screws or bolts as indicated in your chosen plan;
A stable and well-connected frame is paramount. Inspect all connections for tightness and stability before proceeding to the finishing stages.

Finishing Your Adirondack Chair
Elevate your handcrafted chair with a beautiful finish! Sanding ensures smoothness, while paint, stain, or sealant protect the wood and enhance its natural beauty.
Sanding and Smoothing
Achieving a flawlessly smooth surface is paramount for both the aesthetic appeal and the longevity of your Adirondack chair’s finish. Begin with a coarser grit sandpaper – typically 80 or 100 grit – to address any rough edges, splinters, or imperfections left from cutting and assembly.
Progress gradually through medium grits (120-150) and finally to finer grits (180-220) to refine the surface. Pay close attention to edges and curves, ensuring consistent smoothing. A random orbital sander significantly speeds up this process, but hand sanding offers greater control, especially in intricate areas.
Remember to sand with the grain of the wood to avoid unsightly scratches. After sanding, thoroughly remove all dust with a tack cloth or a slightly damp cloth before applying any finish. A well-sanded surface will dramatically improve the adhesion and appearance of your chosen protective coating.
Applying a Protective Finish (Paint, Stain, Sealant)
Protecting your newly built Adirondack chair from the elements is crucial for its durability; Consider your desired aesthetic when choosing a finish – paint offers vibrant color options, while stain enhances the wood’s natural grain. A sealant provides a clear, protective layer.

Apply the finish evenly, following the manufacturer’s instructions. Multiple thin coats are preferable to one thick coat, preventing drips and ensuring better adhesion. Allow each coat to dry completely before applying the next, and lightly sand between coats for an ultra-smooth result.
For outdoor use, opt for finishes specifically formulated for exterior wood, containing UV inhibitors and mildew resistance. Regular reapplication, every one to two years, will maintain the chair’s beauty and extend its lifespan.
Optional: Adding Cushions and Pillows
Elevate your Adirondack chair’s comfort and style with thoughtfully chosen cushions and pillows! These additions transform a beautiful chair into an inviting relaxation spot. Select outdoor-rated fabrics that are resistant to fading, mildew, and water damage – Sunbrella is a popular, durable choice.
Consider the seat depth and back height when choosing cushion sizes. Tie-on straps or non-slip fabric can secure cushions in place, preventing them from sliding off. Pillows add extra support and a pop of color, complementing your outdoor décor.
Don’t be afraid to mix and match patterns and textures for a personalized touch. Remember to store cushions and pillows indoors during inclement weather to prolong their lifespan and maintain their vibrancy.

Troubleshooting Common Building Issues
Encountering challenges during construction is normal! Addressing wood splitting, ensuring stability, and correcting uneven surfaces are key to a successful Adirondack chair build.
Dealing with Wood Splitting
Wood splitting, a common frustration, often occurs during screw or nail insertion, particularly near the edges of boards. Pre-drilling pilot holes is crucial; the diameter should be slightly smaller than the fastener. This relieves stress on the wood fibers, preventing cracks.
Choosing high-quality, appropriately sized fasteners also helps. Avoid over-tightening screws, as this exacerbates the issue. If splitting does occur, wood glue and wood filler can repair minor cracks. For larger splits, consider reinforcing the area with a wood patch or strategically placed screws.
Selecting wood with fewer knots and straight grain can minimize splitting tendencies. Cedar, while beautiful, can be prone to splitting, so extra care is needed. Always work with dry lumber, as wet wood is more susceptible to damage.
Ensuring Chair Stability
A stable Adirondack chair is paramount for safe and comfortable relaxation. Proper assembly, following the plan’s instructions meticulously, is the first step. Pay close attention to the angles of the back and seat – these contribute significantly to balance.
Reinforce joints with exterior-grade wood glue in addition to screws or bolts. Check for squareness throughout the build; a slightly off-kilter frame will compromise stability. Consider adding bracing underneath the seat for extra support, especially if using thinner lumber.
Test the chair on a level surface before finishing. Any wobble indicates a problem that needs addressing. Adjust or reinforce connections as needed to eliminate movement and ensure a solid, dependable seating experience.
Addressing Uneven Surfaces
Uneven ground can render even a well-built Adirondack chair unstable. Before placement, assess your patio or lawn for dips or slopes. Simple solutions include using shims under the chair legs to level it, ensuring all four points of contact are firm.
For more significant inconsistencies, consider a small, level patio stone or paving slab beneath the chair. Alternatively, adjustable chair feet are available, allowing for precise leveling on any terrain. Regularly check the chair’s stability, as ground conditions can shift over time.
If building on a deck, ensure the deck boards themselves are level and secure. Addressing the underlying surface is crucial for maximizing the chair’s comfort and preventing tipping hazards.

Resources for Further Information
Expand your knowledge with online forums, detailed video tutorials, and explore advanced plans for fanback or double Adirondack chairs – inspiration awaits!
Online Forums and Communities
Engage with fellow woodworking enthusiasts in vibrant online forums dedicated to Adirondack chair building! These communities are invaluable resources for sharing experiences, troubleshooting challenges, and discovering unique modifications to free printable plans.
Platforms like Reddit’s r/woodworking and dedicated woodworking forums often host threads specifically discussing Adirondack chair projects. You’ll find seasoned builders willing to offer advice on wood selection, finishing techniques, and even help decipher complex plan instructions.
Don’t hesitate to post pictures of your progress, ask questions, and contribute your own insights. Many forums also feature galleries showcasing completed projects, providing inspiration and demonstrating the diverse possibilities of Adirondack chair design. Active participation can significantly enhance your building experience and lead to a beautifully crafted chair!
Video Tutorials on Adirondack Chair Building
Visualize the building process with comprehensive video tutorials! Platforms like YouTube are brimming with step-by-step guides, demonstrating everything from cutting the wood to applying the final finish. Search for “Adirondack chair build” or “free Adirondack chair plans” to uncover a wealth of visual instruction.
These videos are particularly helpful for understanding complex joinery techniques and ensuring accurate measurements. Many builders provide detailed commentary, explaining the rationale behind each step and offering valuable tips for avoiding common mistakes.
Look for channels specializing in woodworking or DIY projects. Pause, rewind, and re-watch sections as needed to fully grasp the techniques. Supplementing your free printable plans with video guidance can dramatically improve your confidence and the quality of your finished Adirondack chair.
Advanced Plan Options (Fanback, Double Chair)
Beyond the classic design, explore advanced Adirondack chair plans for a unique touch! Fanback chairs offer an elegant, curved backrest, adding a sophisticated aesthetic to your outdoor space. Double chair plans allow you to build a connected seating arrangement, perfect for conversation and shared relaxation.
These plans often require more woodworking experience and precision, but the results are stunning. Search online for “fanback Adirondack chair plans PDF” or “double Adirondack chair plans free” to find suitable options.
Consider the increased material costs and build time associated with these more complex designs. Carefully review the plans to ensure you possess the necessary skills and tools before embarking on these ambitious projects.