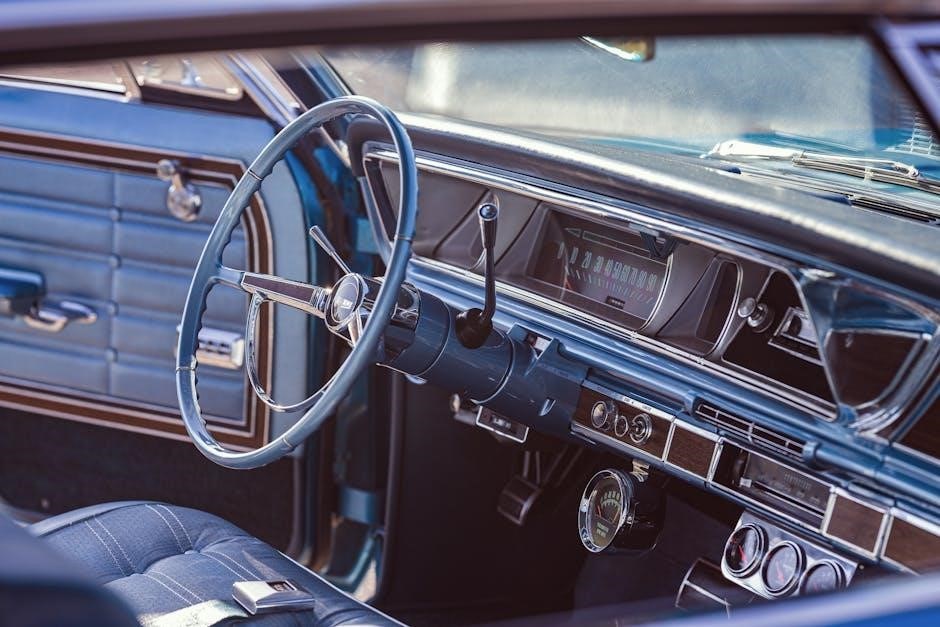
The 1966 Chevelle ignition system is a critical component‚ providing the high-voltage spark essential for engine combustion. The ignition coil wiring diagram guides enthusiasts through electrical connections for repairs and modifications.
1.1 Overview of the Ignition Coil Wiring Diagram
The 1966 Chevelle ignition coil wiring diagram is a detailed guide illustrating the electrical connections for the ignition system. It provides a clear visual representation of the circuit‚ including the flow of power from the battery to the ignition coil and distributor. The diagram highlights key components such as the ignition coil‚ capacitor‚ and spark plug wires‚ ensuring proper connections for optimal performance. Color-coded wires and symbols simplify troubleshooting and repairs‚ making it an indispensable resource for enthusiasts and mechanics working on the 1966 Chevelle.
1.2 Importance of the Ignition System in the 1966 Chevelle
The ignition system is crucial for the 1966 Chevelle‚ as it generates the high-voltage spark necessary for combustion. It powers the vehicle by igniting the air-fuel mixture in the engine’s cylinders‚ ensuring smooth operation and performance. A properly functioning ignition system is essential for reliable starting‚ optimal fuel efficiency‚ and preventing engine misfires. Any malfunction can lead to poor performance‚ reduced power‚ and potential engine damage‚ making it a critical component for both classic car enthusiasts and everyday drivers.
Key Components of the Ignition Coil Circuit
The ignition coil‚ distributor‚ spark plugs‚ wiring harness‚ and capacitors are essential components of the 1966 Chevelle ignition system‚ working together to generate and distribute spark efficiently.
2.1 The Ignition Coil and Its Function
The ignition coil is a vital component of the 1966 Chevelle ignition system‚ responsible for transforming the battery’s low voltage into the high voltage needed for spark generation. By using electromagnetic induction‚ it amplifies the voltage‚ ensuring proper combustion in the engine’s cylinders. The coil is connected to the distributor‚ which directs the spark to the correct spark plugs. Proper grounding and wiring connections are essential for its operation‚ as outlined in the wiring diagram. The ignition coil’s efficiency is critical for maintaining optimal engine performance and preventing misfires.
2.2 The Distributor and Its Role in Spark Distribution
The distributor is a central component of the 1966 Chevelle ignition system‚ responsible for directing high-voltage spark to the correct spark plugs at the right time. It uses a rotating rotor to distribute the spark‚ guided by the engine’s timing. The distributor cap houses the contacts‚ ensuring proper spark routing. The ignition coil provides the voltage‚ while the distributor ensures it reaches the correct cylinder. The wiring diagram details these connections‚ highlighting the distributor’s role in synchronizing spark distribution for efficient combustion and smooth engine operation.
2.3 Spark Plugs and Wires in the Ignition System
Spark plugs and wires are vital in the 1966 Chevelle ignition system‚ delivering high voltage from the coil to the engine cylinders. Spark plugs ignite the air-fuel mixture‚ while wires ensure proper voltage transfer. The wiring diagram highlights connections between the ignition coil‚ distributor‚ and spark plugs‚ emphasizing the importance of secure‚ resistance-rated wires to minimize interference. Regular inspection and replacement of worn or damaged spark plug wires are crucial for maintaining optimal engine performance and preventing misfires. This ensures reliable ignition and smooth engine operation.
2.4 The Wiring Harness and Its Significance
The wiring harness in the 1966 Chevelle ignition system serves as the backbone for electrical connections‚ linking components like the ignition coil‚ distributor‚ and spark plugs. It ensures proper voltage distribution and signal transmission while protecting wires from heat and abrasion. The wiring diagram provides a detailed layout‚ highlighting color-coded wires for easy identification. A well-maintained harness is essential for reliable ignition system performance‚ preventing electrical faults and ensuring the engine runs smoothly. Regular inspection and replacement of damaged sections are recommended to uphold system integrity.
2.5 Capacitors in the Ignition System
Capacitors in the 1966 Chevelle ignition system play a crucial role in filtering voltage fluctuations and reducing radio interference. They are typically installed on the ignition coil and alternator to ensure stable electrical flow. Proper grounding of capacitors is essential to prevent voltage spikes and electrical noise. The wiring diagram highlights their placement and connections‚ emphasizing their importance in maintaining system reliability. Regular inspection and replacement of capacitors are recommended to prevent ignition misfires and electrical malfunctions‚ ensuring optimal performance of the ignition system.
Understanding the 1966 Chevelle Ignition Coil Wiring Diagram
The 1966 Chevelle ignition coil wiring diagram is a visual guide detailing electrical connections for the ignition system‚ essential for repairs and modifications. Available as a PDF‚ it provides a clear‚ intuitive layout with labeled components for easy troubleshooting and installation of ignition-related parts.
3.1 Visual Representation of the Wiring Connections
The 1966 Chevelle ignition coil wiring diagram offers a detailed visual layout of electrical connections‚ simplifying the identification of components such as the ignition coil‚ distributor‚ and spark plugs. Color-coded wires and clear labels provide a straightforward guide for enthusiasts to trace circuits and diagnose issues. This visual aid ensures accurate connections‚ preventing potential miswiring that could lead to system malfunctions. The diagram’s clarity makes it an indispensable tool for both novice restorers and experienced mechanics working on the classic vehicle.
3.2 Color Coding of the Wires
The wiring diagram uses a color-coded system to identify each wire’s purpose‚ ensuring accurate connections. For example‚ the pink wire typically represents the 12V ignition circuit‚ while other colors like black‚ red‚ and green denote ground‚ power‚ and accessory circuits‚ respectively. This standardized coloring helps enthusiasts quickly trace connections and diagnose issues‚ preventing miswiring. The color coding aligns with industry standards‚ making it easier to understand and work with the ignition system‚ even for those new to classic car restoration.
3.3 Key Symbols and Abbreviations Used in the Diagram
The wiring diagram incorporates standardized symbols and abbreviations to clearly represent components and connections. For instance‚ “IGN” denotes the ignition system‚ while symbols like a battery or coil represent their respective parts. These elements ensure clarity‚ helping users identify connectors‚ grounds‚ and power sources efficiently. Abbreviations like “V+” for positive voltage and “GND” for ground simplify the layout‚ making the diagram accessible even to those unfamiliar with technical schematics‚ thus aiding in accurate repairs and modifications.
Downloading the 1966 Chevelle Ignition Coil Wiring Diagram PDF
The PDF is easily accessible online‚ offering detailed electrical connections for the ignition system. It serves as an essential guide for repairs and modifications of the classic Chevelle.
4.1 Official Sources for the Wiring Diagram
Official sources like Chevrolet’s archives and authorized repair manuals provide authentic wiring diagrams. These documents ensure accuracy and reliability for enthusiasts working on their 1966 Chevelle.
4.2 Third-Party Websites and Forums
Enthusiast forums and third-party sites offer downloadable PDFs of the 1966 Chevelle ignition coil wiring diagram. These platforms‚ like classic car communities and specialized automotive forums‚ provide valuable resources for DIY repairs and modifications‚ often shared by experienced users. However‚ verifying the diagram’s accuracy is crucial to ensure compatibility and safety.
4.3 Tips for Verifying the Diagram’s Authenticity
Verifying the authenticity of the 1966 Chevelle ignition coil wiring diagram ensures accurate and safe repairs. Cross-reference the PDF with official repair manuals or trusted sources. Check for clear‚ detailed schematics and correct color coding. Look for publisher credentials or community endorsements. Be cautious of low-resolution or incomplete diagrams‚ as they may contain errors. Consulting forums or experts can also help confirm the diagram’s reliability before starting any electrical work on your classic vehicle.
Step-by-Step Installation Guide Using the Wiring Diagram
Use the wiring diagram to guide the installation process. Start by disconnecting the battery‚ then connect the ignition coil‚ route spark plug wires‚ and ensure proper grounding for optimal performance.
5.1 Preparing the Tools and Materials
To install the ignition system‚ gather essential tools and materials. You’ll need a multimeter‚ wire cutters‚ connectors‚ and a torque wrench for spark plugs. Ensure you have the ignition coil‚ spark plug wires‚ and capacitors ready. Refer to the wiring diagram to identify components. Safety gear like gloves and goggles is recommended. Organize all parts and tools beforehand to streamline the process. Verify the wiring harness condition and prepare for potential soldering or crimping. Consult the diagram for specific torque specifications and connection points to avoid errors during installation.
5.2 Connecting the Battery to the Ignition Coil
Start by disconnecting the battery to prevent electrical shocks. Locate the ignition coil‚ typically near the distributor. Use the wiring diagram to identify the positive and negative terminals. Connect the positive battery cable to the ignition coil’s positive terminal. Ensure the connection is secure and free from corrosion. Refer to the diagram for specific routing to avoid interference. Double-check all connections to prevent voltage drops. Finally‚ reconnect the battery and test the system to ensure proper function. Always follow safety guidelines when handling electrical components.
5.3 Routing the Spark Plug Wires
Refer to the wiring diagram to ensure correct routing of spark plug wires. Start by connecting the coil wire to the distributor cap‚ following the diagram’s visual guide. Route each spark plug wire to its corresponding cylinder‚ avoiding cross-connections. Secure wires with clips or looms to prevent interference with moving engine parts. Avoid routing near high-heat sources or sharp edges. Proper routing ensures consistent spark delivery‚ preventing misfires and optimizing engine performance. Double-check connections to maintain accurate firing order as specified in the diagram.
5.4 Ensuring Proper Grounding
Proper grounding is essential for the ignition system to function correctly. Start by verifying the battery ground connection to the chassis and engine block. Ensure the ignition coil’s ground wire is securely attached to the chassis or engine. Check the distributor’s ground strap for cleanliness and tightness. Clean any rust or corrosion from ground points using a wire brush. Refer to the wiring diagram for specific grounding locations. Proper grounding prevents voltage drops and ensures consistent spark delivery‚ optimizing engine performance and reliability.
Common Mistakes to Avoid When Wiring the Ignition Coil
Common mistakes include incorrect wire connections‚ overlooking the capacitor installation‚ and improper grounding techniques. These errors can lead to poor spark performance and engine misfires.
6.1 Incorrect Wire Connections
Incorrect wire connections are a common issue when wiring the ignition coil. Misconnecting wires can lead to sparks‚ misfires‚ or even damage to components. Always refer to the wiring diagram to ensure proper connections. For example‚ the PINK 12V ignition wire should be routed correctly to avoid power supply issues. Double-checking connections before starting the engine is crucial to prevent electrical faults and ensure smooth operation. Properly securing connectors and avoiding crossed wires are essential steps to maintain system reliability and performance.
6.2 Overlooking the Capacitor Installation
Overlooking the capacitor installation is a common mistake that can cause ignition system malfunctions. Capacitors are essential for filtering voltage spikes and ensuring proper coil operation. Without them‚ the system may experience interference or failure. Always install capacitors on the ignition coil and alternator‚ as shown in the wiring diagram. Ensure they are securely connected and properly grounded to maintain system stability and performance. Neglecting this step can lead to unreliable ignition and potential damage to electrical components.
6.3 Improper Grounding Techniques
Improper grounding is a frequent issue that can disrupt the ignition system’s performance. Grounding ensures proper current flow and voltage regulation. If ground connections are loose‚ corroded‚ or incorrectly installed‚ the ignition coil and other components may malfunction. Always follow the wiring diagram to identify correct grounding points. Ensure all connections are clean and securely fastened. Poor grounding can lead to intermittent sparks‚ misfires‚ or complete system failure. Regularly inspect and maintain grounding points to avoid such issues and ensure reliable ignition system operation.

Troubleshooting the Ignition System
Troubleshooting the ignition system involves identifying faulty wires‚ spark plug issues‚ or distributor malfunctions. Always check for sparks‚ test voltage‚ and inspect connections to diagnose problems accurately.
7.1 Identifying Faulty Wires or Connections
Identifying faulty wires or connections in the 1966 Chevelle ignition system requires a thorough inspection of the wiring harness and connections. Use the wiring diagram to trace circuits and locate potential issues. Look for signs of wear‚ fraying‚ or corrosion on wires and connectors. Perform continuity tests to ensure proper electrical flow. Check for loose or corroded terminals‚ especially at the ignition coil and distributor. Test voltage at key points to identify drops or open circuits. Always consult the wiring diagram to ensure accurate diagnostics and avoid misdiagnosis.
7.2 Diagnosing Ignition Coil Failures
Diagnosing ignition coil failures in the 1966 Chevelle involves checking for common symptoms like engine misfires‚ weak spark‚ or rough idling. Inspect the coil for visible damage or wear. Use a multimeter to test the coil’s resistance‚ ensuring it matches the manufacturer’s specifications. Check the wiring diagram to verify proper connections to the distributor and battery. Measure voltage at the coil terminals to detect any drops or shorts. If the coil fails these tests‚ replacement is necessary to restore proper ignition system function.
7.3 Testing the Distributor Cap and Rotor
Testing the distributor cap and rotor is crucial for ensuring proper spark distribution. Inspect the cap for cracks‚ carbon tracking‚ or corrosion‚ and replace it if damaged. Check the rotor for wear or misalignment. Use a multimeter to test for shorts or resistance issues. Ensure the rotor aligns correctly with the spark plug wires. If the cap or rotor fails these tests‚ replace them to maintain consistent spark delivery and prevent engine misfires or performance issues.
Upgrading to a Modern Ignition System
Upgrading to a modern ignition system enhances performance and reliability. Install an HEI distributor or aftermarket ignition coil for improved spark energy and consistency‚ ensuring better engine operation.
8.1 HEI Distributor Upgrade
Upgrading to an HEI (High Energy Ignition) distributor improves spark energy and reliability. The HEI system eliminates the points-style ignition‚ reducing maintenance and enhancing performance. It integrates seamlessly with modern ignition coils‚ providing a consistent and high-energy spark. The HEI distributor is a popular choice for 1966 Chevelle owners looking to modernize their ignition system. Proper installation requires consulting the wiring diagram to ensure correct connections. This upgrade is ideal for those seeking improved engine efficiency and reduced ignition-related issues over time.
8.2 Installing an After-Market Ignition Coil
Installing an after-market ignition coil enhances the 1966 Chevelle’s ignition system performance. These coils offer higher energy output and improved durability compared to stock components. Ensure compatibility with your vehicle’s distributor and spark plugs. Refer to the wiring diagram for proper connections‚ especially the positive and negative terminals. Some coils may require additional wiring for features like a tachometer signal. Always consult the manufacturer’s instructions and the wiring diagram to avoid installation errors and ensure optimal system functionality.
8.3 Integrating Electronic Ignition Systems
Upgrading to an electronic ignition system enhances performance and reliability. Modern systems like HEI distributors or MSD ignitions eliminate points-based setups‚ reducing maintenance and improving spark consistency. Consult the wiring diagram to ensure proper connections‚ especially for components requiring a direct 12V feed. Some systems may need additional wiring for features like rev limiters or tachometer integration. Always disconnect the battery before starting modifications to avoid electrical hazards. Follow the wiring diagram and manufacturer instructions for a seamless installation‚ ensuring compatibility with your 1966 Chevelle’s engine configuration.
Maintenance Tips for the Ignition System
Regular inspections and replacements ensure optimal performance. Inspect spark plug wires for wear‚ clean the distributor cap‚ and replace the ignition coil as recommended.
9.1 Regular Inspection of Spark Plug Wires
Regular inspection of spark plug wires is crucial for maintaining the 1966 Chevelle’s ignition system. Over time‚ these wires can deteriorate‚ leading to poor engine performance and misfires. Cracks‚ frays‚ or signs of wear on the insulation should be addressed immediately. Use a spark tester to check for proper spark distribution. Additionally‚ ensure that all connections are secure and free from corrosion. Replacing worn-out wires with high-quality‚ OEM-spec components will help maintain reliable ignition and prevent further issues.
9.2 Cleaning the Distributor Cap and Rotor
Cleaning the distributor cap and rotor is essential for maintaining proper spark distribution in the 1966 Chevelle’s ignition system. Over time‚ dirt‚ oil‚ and moisture can accumulate‚ leading to misfires and poor engine performance. Use a soft brush or cloth to gently remove debris from the cap and rotor. Avoid using harsh chemicals‚ as they may damage the components. Ensure all surfaces are dry before reinstallation. Regular cleaning helps prevent wear and tear‚ ensuring consistent ignition system functionality and optimal engine operation.
9.3 Replacing the Ignition Coil at Recommended Intervals
Replacing the ignition coil at recommended intervals ensures optimal performance and longevity of the 1966 Chevelle’s ignition system. Over time‚ the ignition coil can degrade‚ leading to weaker sparks and potential engine misfires. Manufacturers typically recommend replacing the coil every 50‚000 to 100‚000 miles‚ depending on usage. When replacing‚ disconnect the battery to prevent electrical shocks. Use a wrench to remove the old coil and install the new one‚ ensuring all connections are secure. Refer to the wiring diagram for accurate installation. Proper replacement maintains reliable spark generation‚ crucial for efficient combustion and smooth engine operation.
Resources and Communities for 1966 Chevelle Enthusiasts
Enthusiasts can access repair manuals‚ online forums‚ and communities for detailed guidance and support. Annual meets and events also provide opportunities to connect with fellow classic car owners and experts.
10.1 Recommended Repair Manuals and Guides
For accurate repairs‚ enthusiasts should use official Chevrolet repair manuals or trusted guides specific to the 1966 Chevelle. These resources provide detailed wiring diagrams‚ troubleshooting tips‚ and step-by-step instructions. Additionally‚ Haynes and Chilton manuals are excellent for DIY projects‚ offering comprehensive coverage of ignition systems and wiring. Online forums often recommend these manuals‚ ensuring authenticity and relevance for maintaining or restoring the vehicle’s electrical system effectively.
10.2 Online Forums and Discussion Groups
Online forums like ClassicChevelle.com and ChevelleTech.com offer valuable resources and discussions for 1966 Chevelle enthusiasts. These platforms provide access to wiring diagrams‚ troubleshooting tips‚ and DIY guides. Members often share personal experiences‚ helping others resolve ignition system issues. Additionally‚ forums like TeamChevelle.net host expert advice and rare documentation‚ making them indispensable for restoring or upgrading the vehicle. Engaging with these communities ensures access to accurate information and support from experienced restorers and enthusiasts.
10.3 Annual Meets and Events for Classic Car Owners
Annual meets and events for classic car owners are fantastic opportunities to connect with fellow enthusiasts. Events like the Chevelle Nationals and classic car shows provide platforms to showcase vehicles and share knowledge. These gatherings often feature expert sessions‚ parts swaps‚ and hands-on tips for maintaining and upgrading ignition systems. Attending such events can be invaluable for networking and accessing rare resources‚ ensuring the preservation of the 1966 Chevelle’s legacy. They foster community and passion‚ making them essential for any classic car enthusiast.
The 1966 Chevelle ignition coil wiring diagram is a vital resource for enthusiasts‚ ensuring proper electrical connections and system functionality. It simplifies repairs and upgrades‚ preserving the car’s legacy.
11.1 The Importance of Accurate Wiring Diagrams
Accurate wiring diagrams are crucial for ensuring the proper functioning of the 1966 Chevelle’s ignition system. They provide a clear visual guide‚ helping enthusiasts avoid misconnections that can lead to system failures or electrical fires. By following the diagram‚ users can identify each wire’s purpose and routing‚ ensuring the ignition coil‚ distributor‚ and spark plugs operate in harmony. This precision is essential for maintaining performance‚ reliability‚ and safety‚ making the diagram an indispensable tool for any repair or modification project.
11.2 Final Tips for a Smooth Ignition System Installation
For a seamless ignition system installation‚ always refer to the wiring diagram to ensure accurate connections. Proper grounding is essential to prevent interference and maintain reliable spark output. Install capacitors to filter noise and protect components. Route wires away from heat sources and moving parts to prevent damage. Double-check all connections before powering up‚ and test the system thoroughly after installation. These steps ensure a smooth‚ efficient‚ and safe ignition system operation‚ preserving the performance and longevity of your 1966 Chevelle.