Krups waffle irons deliver consistently delicious results, featuring convenient indicator lights and audible beeps for perfect baking every time.
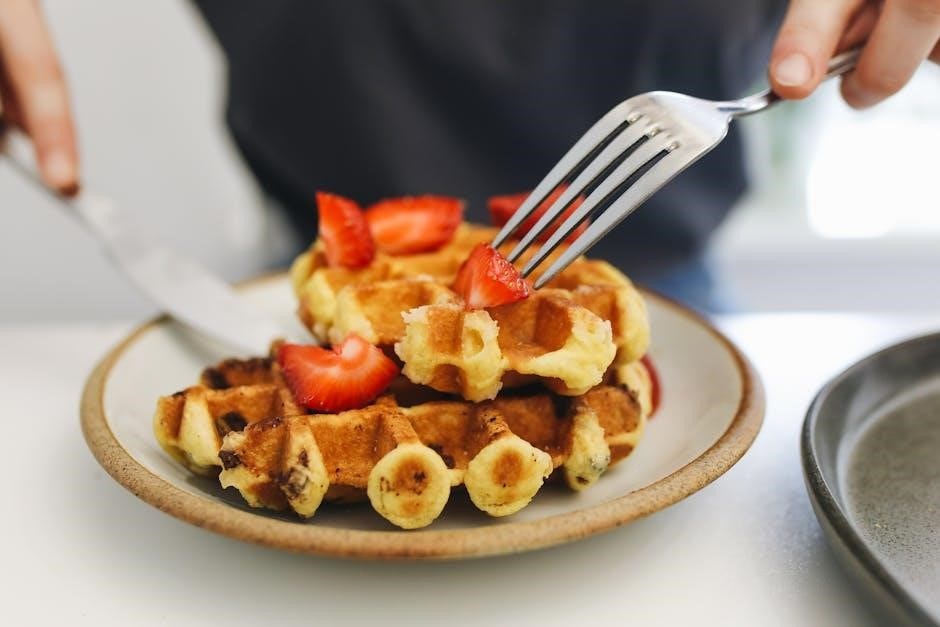
Enjoy extra-deep pockets ideal for various toppings, enhancing your breakfast or dessert experience with ease and flavor.
What is a Krups Waffle Iron?
A Krups waffle iron is a small kitchen appliance designed specifically for quickly and efficiently cooking waffles. These irons utilize heated plates, often with a non-stick coating, to create the classic waffle grid pattern. Krups offers a variety of models, including traditional and Belgian waffle makers, catering to different preferences for waffle thickness and pocket depth.
Many Krups waffle irons, like the GQ502D51, boast user-friendly features such as red and green indicator lights, eliminating guesswork during the cooking process. An audible beep signals when the waffle is perfectly baked and ready to enjoy, ensuring consistent results. They are built for convenience and delicious outcomes.
Why Choose a Krups Waffle Iron?
Krups waffle irons stand out due to their blend of functionality and ease of use. The integrated indicator lights and audible alerts, as seen in models like the GQ502D51, guarantee perfectly cooked waffles without constant monitoring. This simplifies breakfast preparation, especially during busy mornings.
Furthermore, Krups waffle makers consistently deliver waffles with deep pockets, ideal for holding generous amounts of syrup, fruit, or cream. Their durable construction ensures longevity, while the non-stick plates facilitate effortless cleaning. Choosing Krups means investing in a reliable appliance for consistently delightful waffles.
Understanding Your Krups Waffle Iron Model
Krups offers diverse waffle iron models, such as the GQ502D51, each with unique features. Familiarizing yourself with your specific model’s components is crucial for optimal use;
Identifying Your Specific Model (GQ502D51, etc.)
Locating your Krups waffle iron’s model number is the first step to accessing specific instructions and support. The model number, like GQ502D51 for the 4-Slice Belgian Waffle Maker, is typically found on a sticker located on the underside of the appliance.
This sticker often includes the serial number as well; Knowing your exact model ensures you download the correct user manual and troubleshooting guides from the Krups website. Different models may have slightly varying features or operational nuances. Referencing the correct documentation guarantees safe and effective waffle-making, maximizing your appliance’s performance and lifespan.
Key Features and Components
Krups waffle irons boast several key features for user convenience. Red and green indicator lights clearly signal when the iron is powered on, preheated, and when waffles are ready, eliminating guesswork. An audible beep further confirms baking completion.
The non-stick plates are central, ensuring easy waffle removal and cleanup. Many models feature extra-deep pockets, perfect for holding generous amounts of syrup or toppings. Essential components include the housing, heating plates, temperature control, and power cord. Understanding these parts aids in proper operation and maintenance.
First-Time Use & Preparation
Before first use, carefully unbox your Krups waffle iron and inspect for any damage. Thoroughly clean the plates to remove any manufacturing residue or debris.
Unboxing and Initial Inspection
Carefully remove your new Krups waffle iron from its packaging, ensuring all packing materials are accounted for. Inspect the appliance and its power cord for any visible signs of damage incurred during shipping. Do not use the waffle iron if any damage is detected; contact customer support immediately.
Verify that all included components – the waffle iron itself, the user manual, and any accompanying accessories – are present. Familiarize yourself with the waffle iron’s exterior, noting the location of the power button, indicator lights, and waffle plate release mechanism. A thorough initial inspection guarantees safe and optimal performance from the start.
Cleaning Before First Use
Before your inaugural waffle-making session, it’s crucial to thoroughly clean your Krups waffle iron. Unplug the appliance and allow it to cool completely. Gently wipe down the exterior with a damp, soft cloth – avoid abrasive cleaners.
For the plates, use a slightly damp cloth to remove any manufacturing residue. Do not immerse the waffle iron in water. Ensure the plates are completely dry before proceeding. This initial cleaning process removes potential odors and ensures a hygienic cooking surface, preparing your Krups waffle iron for delicious results.
Seasoning the Plates (If Applicable)
Generally, modern Krups waffle irons with non-stick coatings do not require seasoning. However, some older models or those with uncoated plates may benefit from it. If seasoning is recommended for your specific model, lightly brush the plates with a high smoke point oil – canola or vegetable oil work well.
Heat the waffle iron on a low setting for a few minutes, then wipe away any excess oil with a clean cloth. Repeat this process once or twice. This creates a protective layer, minimizing sticking and enhancing the waffle’s release.
Operating Instructions
Power on your Krups waffle iron and observe the indicator lights; a ready beep signals preheating completion, preparing it for delicious waffle creation.
Powering On and Indicator Lights
To begin, ensure the waffle iron is properly plugged into a grounded electrical outlet. Upon powering on, the unit will typically illuminate a power indicator light, usually red, signifying it’s receiving electricity.
As the waffle iron preheats, a separate indicator light, often green, will activate. This indicates the unit is reaching the optimal cooking temperature. Crucially, many Krups models feature an audible “ready” beep alongside the green light, eliminating guesswork.
These clear visual and auditory cues ensure you know precisely when the waffle iron is prepared to receive batter, guaranteeing perfectly cooked waffles every time. Never attempt to add batter before the ready signal!
Preheating the Waffle Iron
Allowing sufficient preheating time is vital for achieving golden-brown waffles that release easily from the plates. Once powered on, the Krups waffle iron will begin to heat up, indicated by the change in the indicator light – typically from red to green.
The preheating process generally takes between three to five minutes, though this can vary slightly depending on the specific model. The audible “ready” beep serves as a definitive signal that the iron has reached the ideal temperature.
Resist the urge to open the lid prematurely; proper preheating ensures even cooking and prevents sticking. A fully preheated iron is key to waffle success!
Adding Batter
Once the waffle iron is preheated and the ready indicator illuminates, carefully pour the batter onto the lower plate. The amount of batter will depend on your desired waffle thickness and the size of your Krups model; generally, approximately ½ to ¾ cup is sufficient for a standard Belgian waffle iron.
Avoid overfilling, as this can cause batter to overflow and create a mess. Spread the batter evenly across the plate, leaving a small border around the edges.
Close the lid gently, ensuring it latches securely. Do not force the lid closed, as this could damage the iron or cause batter to squeeze out.
Cooking Time and Temperature Settings
Krups waffle irons typically feature adjustable temperature settings, allowing you to customize the browning level of your waffles. Start with a medium setting and adjust as needed based on your preference. Cooking time varies depending on the model and desired crispness, but generally ranges from 3 to 5 minutes.
The ready indicator light or audible beep will signal when the waffle is cooked. Avoid lifting the lid prematurely, as this can cause the waffle to tear.
For consistently golden-brown waffles, avoid opening the iron until the indicator signals completion.

Waffle Making Techniques
Achieve golden-brown waffles by using the correct batter consistency and avoiding opening the iron before the ready signal activates.
Experiment with mix-ins like fruits or chocolate chips for added flavor!
Achieving Golden Brown Waffles
To consistently achieve perfectly golden-brown waffles with your Krups waffle iron, understanding a few key techniques is essential. Firstly, ensure the iron is fully preheated; the indicator lights will signal readiness. Avoid lifting the lid prematurely, as this disrupts the cooking process and can result in pale, uneven waffles.
The amount of batter poured onto the plates is also crucial – follow the recommended guidelines for your specific model to prevent overflow or underfilled waffles. Resist the urge to add oil or spray directly onto the non-stick plates, as this can degrade the coating over time. Patience is key; allow the waffle iron to work its magic!
Batter Consistency for Optimal Results
Achieving the ideal waffle texture hinges on batter consistency. A batter that’s too thin will spread excessively, yielding crispy, yet flimsy waffles. Conversely, a batter too thick may produce dense, unevenly cooked results. Aim for a consistency similar to pancake batter – pourable, but not watery.
Slight lumps are perfectly acceptable; in fact, overmixing can develop gluten, leading to tougher waffles. If using a mix, adhere strictly to the package instructions. For homemade recipes, a blend of melted butter and separated egg whites whipped to stiff peaks contributes to light and fluffy waffles. Remember, experimentation is key to finding your perfect batter!
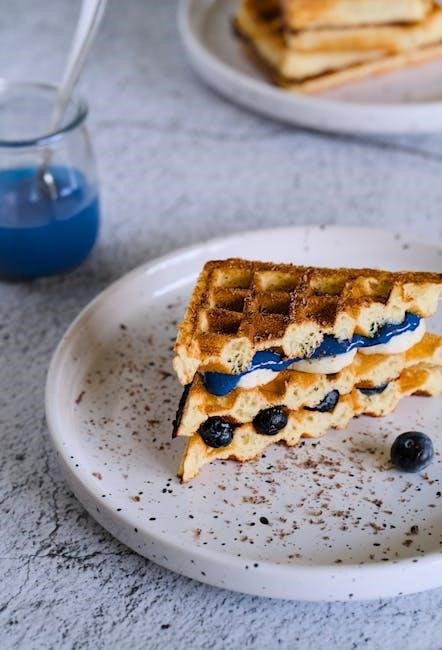
Adding Mix-Ins (Fruits, Chocolate Chips, etc.)
Elevate your waffles with delightful mix-ins! Gently fold in your chosen additions – blueberries, sliced strawberries, chocolate chips, or even chopped nuts – after preparing the batter. Avoid overmixing, as this can deflate the batter and result in uneven distribution.
A general guideline is to use approximately ½ to ¾ cup of mix-ins per batch of batter. For delicate fruits, lightly dust them with flour before adding to prevent them from sinking to the bottom during cooking. Don’t overload the batter; too many mix-ins can hinder proper waffle formation and cooking;
Cleaning and Maintenance
Always unplug and cool the waffle iron completely before cleaning. Wipe plates with a damp cloth, removing any stuck-on batter gently to preserve non-stick coating.
Cooling Down the Waffle Iron
Before initiating any cleaning or maintenance procedures, it is absolutely crucial to allow your Krups waffle iron to cool down completely. This is paramount for safety, preventing accidental burns from the hot plates and internal components. Disconnect the waffle iron from the power outlet immediately after use to halt the heating process.
Resist the urge to expedite cooling with water or forceful air, as rapid temperature changes can potentially damage the non-stick coating or internal mechanisms. Allow ample time – typically 30 to 60 minutes – for the unit to reach a safe handling temperature. A cooled waffle iron ensures a safe and effective cleaning process, prolonging its lifespan and maintaining optimal performance.
Cleaning the Plates
Once the waffle iron is completely cool, gently clean the plates to remove any residual batter. Avoid abrasive cleaners or scouring pads, as these can damage the non-stick coating. A soft cloth or sponge dampened with warm, soapy water is ideal. Wipe the plates thoroughly, ensuring all batter remnants are removed.
For stubborn residue, allow warm water to sit on the plates for a few minutes to loosen the debris before wiping. Never immerse the waffle iron in water. Dry the plates completely with a soft cloth before storing. Regular cleaning maintains optimal performance and prevents batter buildup, ensuring consistently delicious waffles.
Removing Stuck-On Batter
If batter stubbornly adheres to the plates, avoid metal utensils that could scratch the non-stick surface. Instead, create a paste of baking soda and water, applying it gently to the affected areas. Let it sit for 5-10 minutes to soften the residue.
Then, use a soft nylon brush or cloth to carefully scrub away the loosened batter. For particularly tough spots, reapply the paste and allow a longer soaking time. Ensure all baking soda residue is removed with a damp cloth before drying. Consistent gentle cleaning prevents future sticking and preserves the waffle iron’s performance.
Storage Instructions
Before storing your Krups waffle iron, ensure it is completely cool, clean, and dry. Store it in a cool, dry place, preferably in its original packaging to protect the non-stick coating. Avoid storing other items directly on top of the plates, as this could cause scratches or damage.
If you don’t have the original packaging, wrap the plates with soft cloth or paper. Storing it upright can also help prevent any lingering moisture buildup. Proper storage extends the lifespan of your waffle iron and maintains its optimal performance for years of delicious waffles.
Troubleshooting Common Issues
If your Krups waffle iron isn’t heating, waffles stick, or lights malfunction, check the power connection and ensure proper cleaning to resolve these issues.
Waffle Iron Not Heating
If your Krups waffle iron fails to heat, begin by verifying the power cord is securely plugged into a functioning outlet. Test the outlet with another appliance to confirm it’s delivering power.
Next, examine the power cord itself for any visible damage, such as fraying or cuts. A damaged cord presents a safety hazard and should be replaced. Ensure the waffle iron’s indicator lights illuminate when plugged in, signaling it’s receiving power.

If the lights don’t come on, there might be an internal issue requiring professional repair. Allow the unit to cool completely before inspecting or attempting any troubleshooting steps; A lack of heat often indicates a problem with the heating element or internal wiring.
Waffles Sticking to the Plates
If waffles persistently stick to the plates, ensure the iron is adequately preheated before adding batter; this is crucial for a non-stick surface. Avoid using cooking sprays or oils, as they can create a sticky residue over time, worsening the problem.
Instead, a light coating of batter spread evenly across the plates often works best. Allow the waffle to cook fully, indicated by the iron’s ready signal, before attempting removal. Gently lift the waffle with a non-metallic utensil to prevent scratching the non-stick coating.
Thorough cleaning after each use, removing all batter residue, is essential to maintain a non-stick surface.
Indicator Lights Not Working
If the indicator lights aren’t functioning, first verify the waffle iron is securely plugged into a working electrical outlet. Check the power cord for any visible damage; a damaged cord poses a safety risk and requires replacement. If the outlet and cord are fine, the issue might be internal.
Ensure the unit has cooled completely before troubleshooting. Contacting Krups customer support is recommended, as internal electrical problems require professional diagnosis and repair. Do not attempt to disassemble the iron yourself, as this could void the warranty and create a hazard.
Error Codes and Their Meanings (e.g., Error 06 in related Krups products)
While specific error codes for Krups waffle irons are not widely documented, referencing issues in related Krups products, like espresso machines, can offer insight. Error 06, commonly seen in Krups espresso machines, often indicates a flow issue or blockage within the system.
For waffle irons, a similar error could suggest a temperature sensor malfunction or internal wiring problem. If an error appears, immediately unplug the unit. Contact Krups customer support, providing the model number, for accurate diagnosis and guidance. Do not attempt self-repair.

Safety Precautions
Always unplug the waffle iron before cleaning. Avoid burns by allowing it to cool completely, and ensure the power cord is safely managed.
Avoiding Burns and Electrical Hazards
When operating your Krups waffle iron, prioritize safety to prevent burns and electrical shocks. Always ensure the appliance is unplugged before cleaning or attempting any maintenance. The exterior surfaces become hot during use, so avoid direct contact. Utilize oven mitts or heat-resistant tools when handling the waffle iron or removing cooked waffles.
Never immerse the appliance, cord, or plug in water or other liquids. Inspect the power cord regularly for damage, and discontinue use if any fraying or exposed wires are detected. Avoid operating the waffle iron with a damaged cord or plug. Keep the appliance away from flammable materials and ensure adequate ventilation during operation.
Proper Use of the Power Cord
To ensure safe operation, always use the power cord responsibly with your Krups waffle iron. Avoid letting the cord hang over the edge of a counter or table, as this presents a tripping hazard. Never pull the cord to disconnect the appliance from the outlet; instead, grasp the plug firmly.
Do not operate the waffle iron with an extension cord unless absolutely necessary, and if used, ensure the cord is appropriately rated for the appliance’s wattage. Regularly inspect the cord for any signs of damage, such as fraying or cracking, and discontinue use if damage is found. Keep the cord away from heat sources and sharp objects.
Frequently Asked Questions (FAQ)
Waffles are ready when the indicator light changes, and the iron beeps. Avoid spray oils; use batter specifically designed for waffle irons for best results.
How do I know when the waffle is ready?
Determining waffle readiness with your Krups waffle iron is straightforward, thanks to its user-friendly design. The appliance features both visual and auditory cues to signal when your waffle has reached golden-brown perfection. Initially, a red indicator light illuminates, signifying that the iron is heating up and preparing for baking.
Once the optimal temperature is achieved, the red light transitions to green, indicating that it’s time to add your batter. Crucially, the waffle maker also emits a clear, audible beep, further confirming its readiness.
Finally, when the waffle is fully cooked, another beep will sound, letting you know it’s time to remove your delicious creation. These combined signals eliminate guesswork, ensuring consistently perfect waffles every time.
Can I use spray oil on the plates?
Generally, it is not recommended to use aerosol cooking sprays on the non-stick plates of your Krups waffle iron. While seemingly convenient, these sprays can leave a sticky residue that builds up over time, potentially damaging the non-stick coating and impacting the waffle’s release.
This residue can be difficult to remove, requiring extensive cleaning and potentially shortening the lifespan of your appliance. Instead, consider lightly brushing melted butter or oil directly onto the plates using a pastry brush or a silicone brush.
This method provides a more even coating and avoids the residue associated with aerosol sprays, ensuring optimal performance and longevity of your Krups waffle iron.

What type of batter works best?
For optimal results with your Krups waffle iron, a slightly thicker batter generally performs best. This ensures the batter doesn’t spread too thinly, creating light and fluffy waffles with well-defined pockets. Belgian waffle batters, designed for deeper waffle irons, are particularly well-suited for many Krups models.
However, standard waffle recipes also work wonderfully. Avoid overly liquid batters, as they can result in soggy waffles. Experimenting with different recipes is encouraged, but always aim for a consistency that holds its shape when dropped from a spoon.
Remember, a good batter is key to a delicious waffle!

Warranty Information
Krups provides warranty coverage on its waffle irons, protecting against manufacturing defects. Contact Krups customer support for specific details and claim procedures.
Krups Warranty Coverage
Krups typically offers a one-year limited warranty on its waffle irons, covering defects in materials and workmanship from the date of purchase. This warranty doesn’t cover damage resulting from misuse, accidents, or unauthorized repairs. Proof of purchase is essential for any warranty claim.
The warranty ensures that Krups will, at its discretion, repair or replace the defective product. To initiate a claim, contact Krups customer support with your model number and purchase details. Shipping costs for returning the product may be the responsibility of the consumer.
Warranty coverage is valid only for products used in accordance with the provided instructions. Modifications or alterations void the warranty.
Contacting Krups Customer Support
Krups customer support can be reached through various channels for assistance with your waffle iron. Their official website provides a comprehensive FAQ section and troubleshooting guides. You can also connect with a representative via phone during business hours; check the website for the most current contact number.
For written inquiries, Krups offers email support, allowing you to detail your issue and provide relevant information like your model number and purchase date. Social media channels may also offer limited support.
When contacting support, have your proof of purchase ready to expedite the process. Be prepared to describe the issue clearly and concisely;